January 26, 2026

Ever had a recording fail right when you needed it most? Kzzrrt-krrztttt – that's the sound of a lost lecture, seminar or a forgotten conversation. Don't let it happen again!
Today, we'll dive into the common pitfalls of audio recording and offer practical tips to ensure your next Messenger Pigeon session is a success. Whether you're using a smartphone, laptop, or dedicated microphone, these strategies will help you capture clear, high-quality audio.
Sometimes, what we hear live doesn’t translate well when it is recorded on a device and that’s because of several factors:
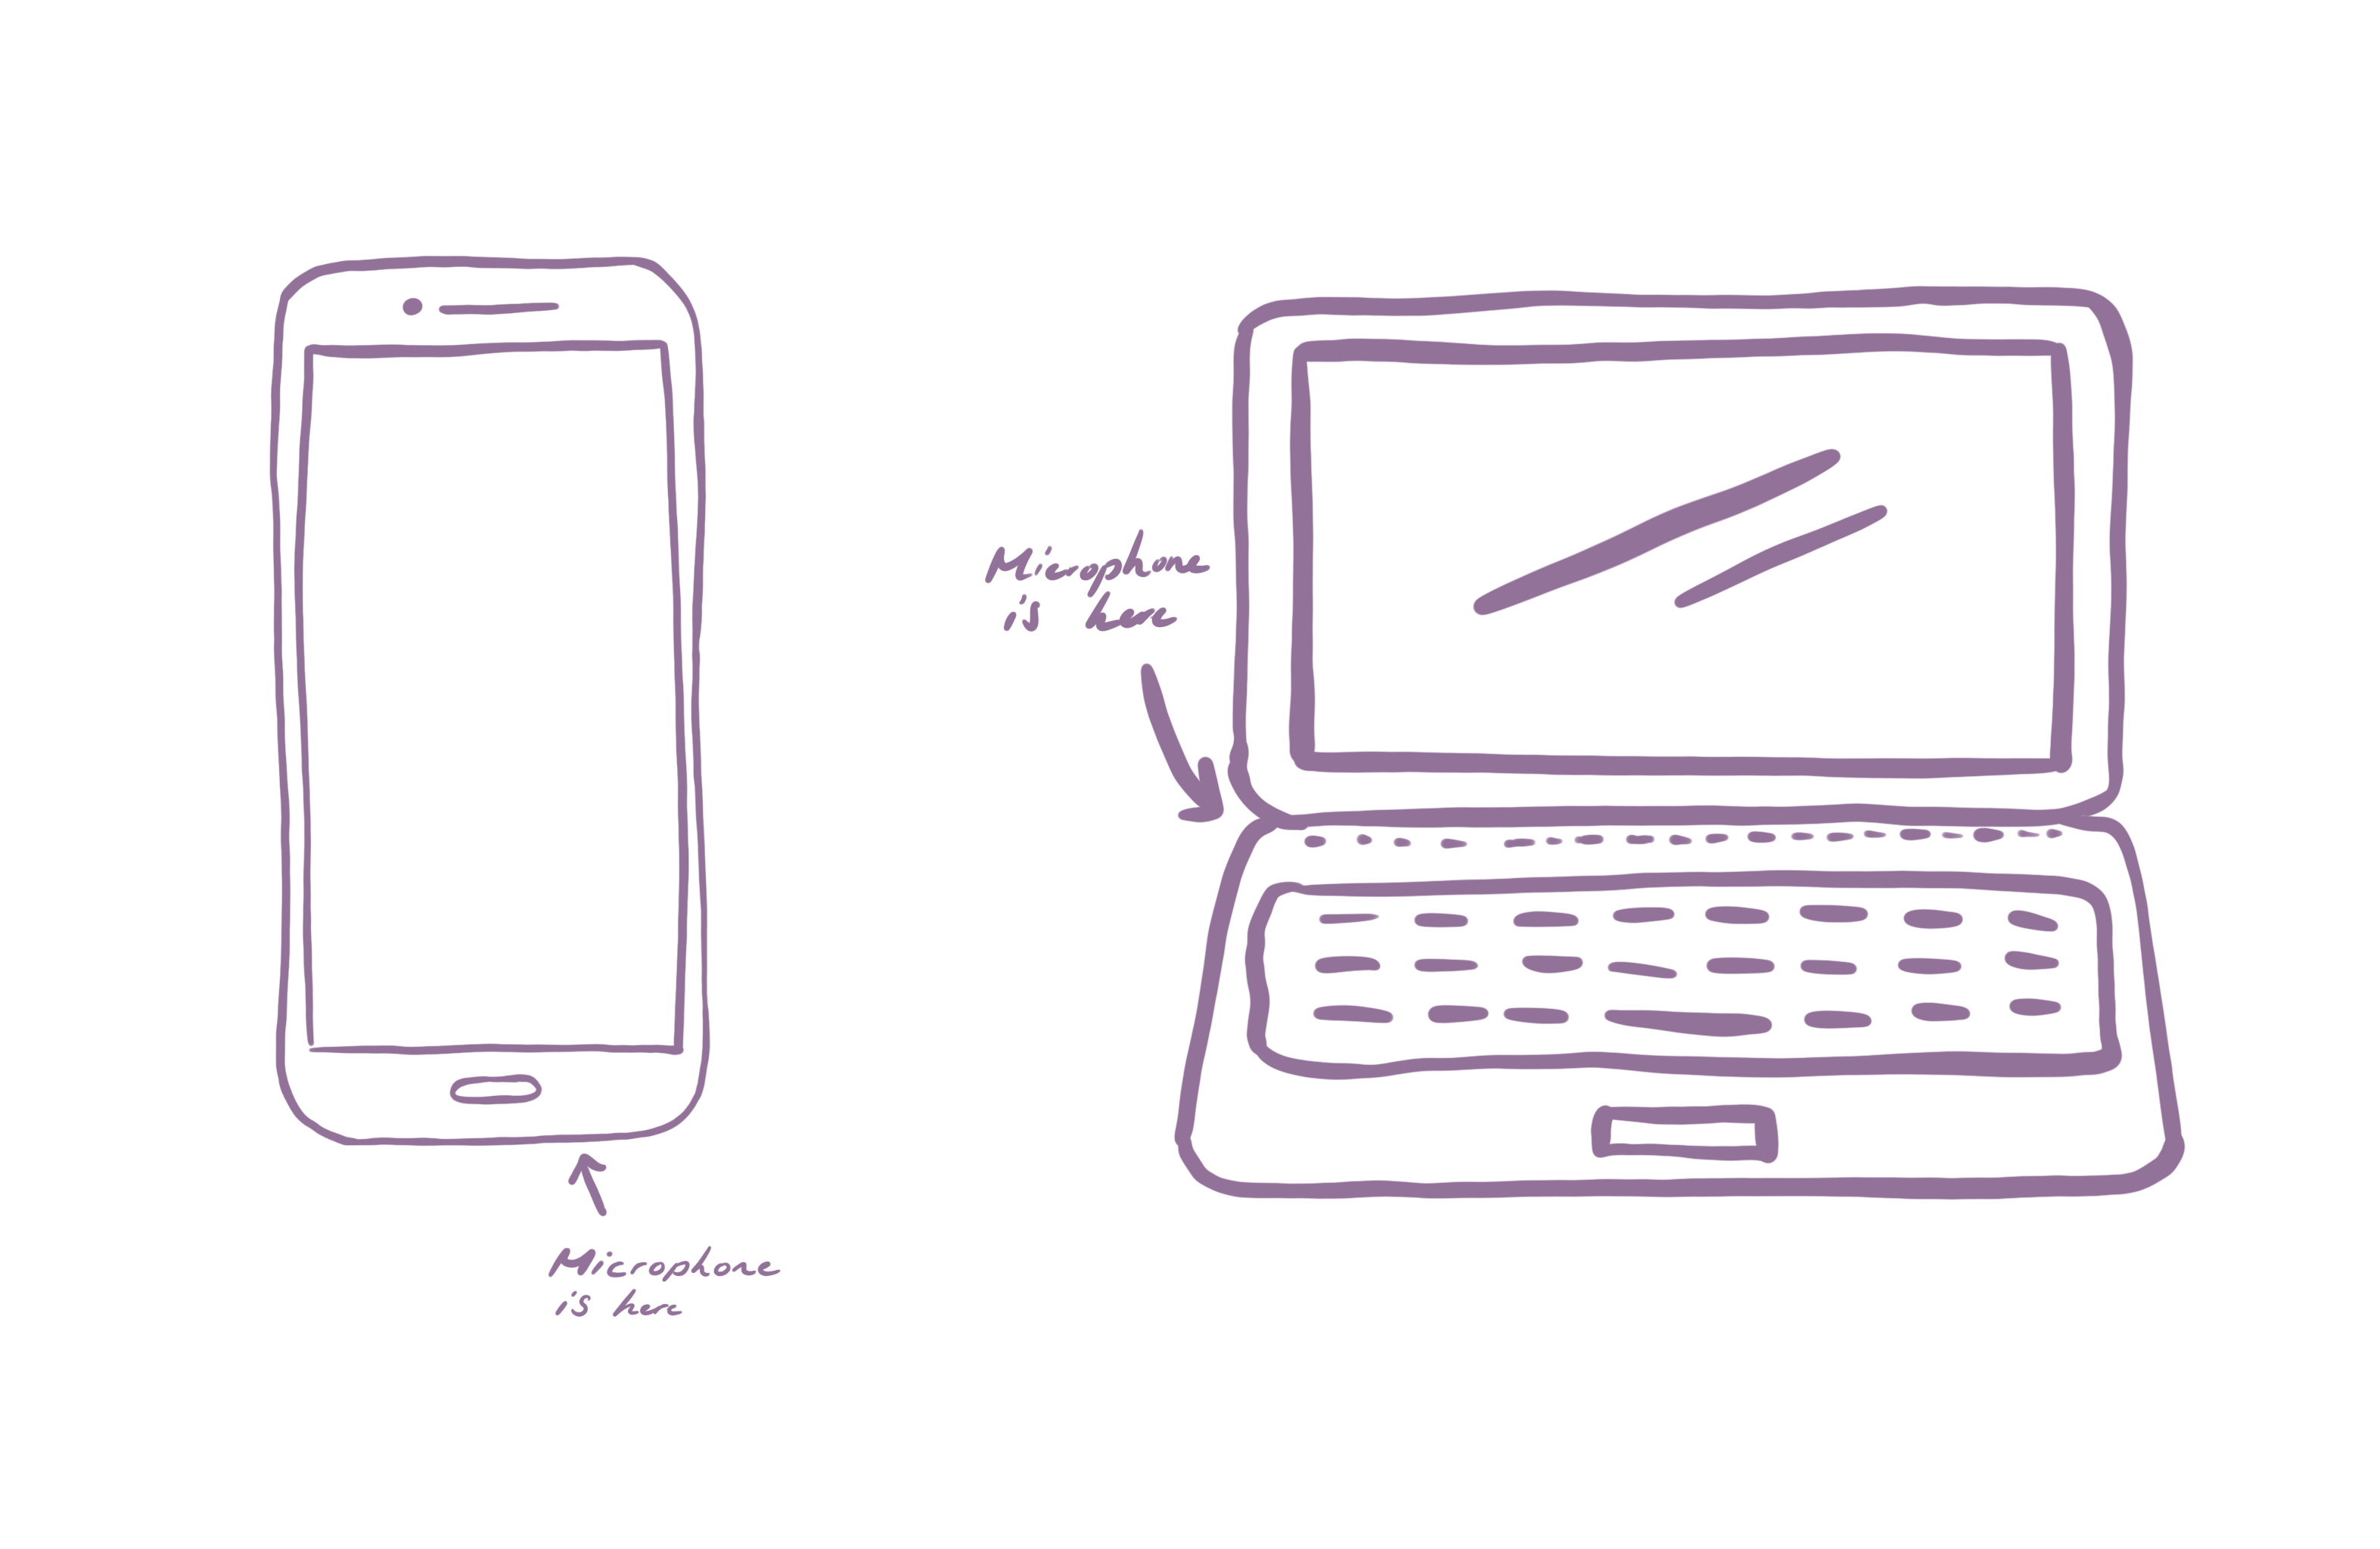
The first two causes of a bad recording can usually be rectified. A lot of people don’t realize that there are many elements that interfere with the recording session. The first being the position/location of their device’s microphone.
Oftentimes, the microphone is pointed away from the main speaker. That makes the audio muffled and it will more likely pick up noise in its direct vicinity.
When Messenger Pigeon is running, check on it once in a while to make sure you see the audio waves on the screen, that will confirm that sound is transmitted into your application. If the waves are too small, it means the recording may be too quiet. On the other hand, if the bars are really tall but almost even in length, there may be competing sources or the sound source is way too loud, which would not guarantee clarity.

In addition, many devices don’t do well with multi-tasking (especially mobile phones), so stay on the recording screen if you are recording a session and don’t exit or “click out” of the recording screen.
Always test your application before a real session to make sure you’re happy with the settings. That way, you’d be more mindful of how your device functions. And just a note regarding the Messenger Pigeon app, after saving your session, make sure you keep the application open and stay in an area with consistent and strong internet connection. Otherwise, there might be interruptions to the file upload.
Never miss an important moment again! With these practical recording tips, you'll capture clear audio every time. Get started with Messenger Pigeon and enjoy worry-free learning sessions that let you focus on what's important to you.